


The introduction of the Unibody Macbook and Macbook Pro models has changed the outline of the display assembly altogether. Presently, there is a glass board panel assembly that is put on top of the LCD board. Luckily, it is conceivable to crack just the glass panel but on the flip side, it is possible to split both the LCD and the glass panel.
If you take your Macbook to most repair companies like MacBook Repair Experts with a cracked display, they’ll undoubtedly recommend for Replacement of entire Macbook Screen. It is truly a greatly troublesome procedure to do yourself. Thus, we have made the step by step instruction guide to demonstrate the best procedure to Replace MacBook LCD Screen:
STEP 1:

Obviously, I recommend separating the battery prior to proceeding with the device dismantling. Likewise, I not simply detached the battery but relatively removed it totally.
STEP 2:
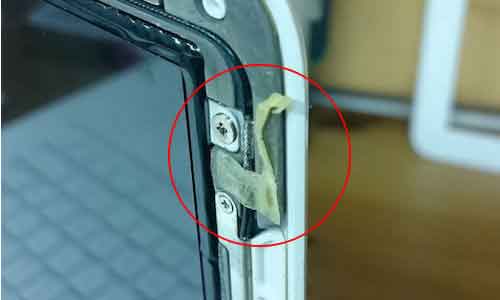
 The Battery is actually secured by 6 screws namely three normal Phillips screws (depicted by yellow circles) plus three tri-wing screws (depicted by red circles).
Important Note: You always have the option to use a small flathead screwdriver if a tri-wing screwdriver is not available.
STEP 3:
 Evacuate the battery of the device.
STEP 4:
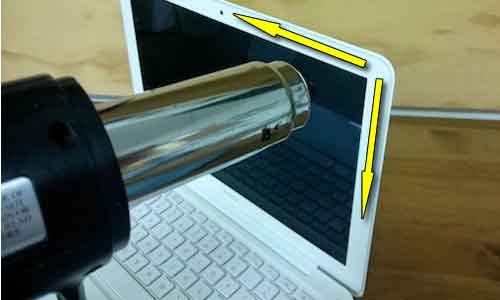 After that, you need to use a heat gun to release the twofold-sided adhesive strip and hold that glass aside.
Caution: Heat the glass in short segments as overheating may cause damage to your MacBook LCD screen. The bezel ought to be sufficiently warm in order to smoothen the sticky tape. Presumably, it is more protected to make use of a hair dryer instead.
STEP 5:
 Separate the bezel by means of a sharp object.
STEP 6:
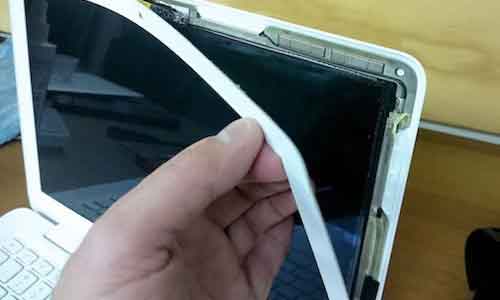 Keep removing the bezel with the help of your fingers. Avoid touching the sticky tape so that it can be used again. As u have already used a heat gun or hair dryer to warm the sticky tape, now use a solid suction cup to separate the glass from the display assembly.
STEP 7:
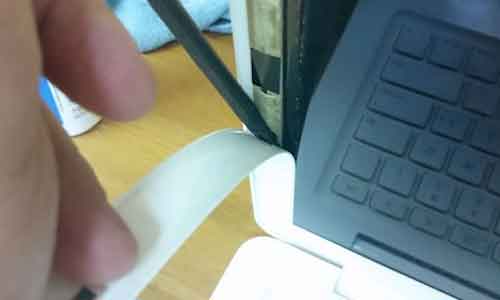 Use a plastic stick for separating the bezel while moving to the lower part of the display assembly. you will observe that the bezel is extremely adaptable.
STEP 8:
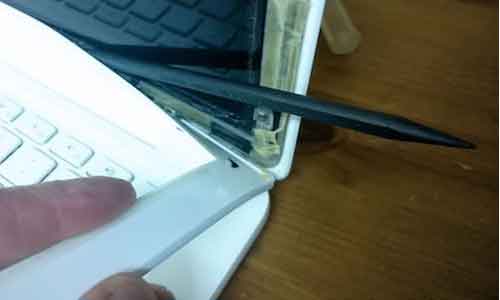 Keep separating the bezel on the lower part of the display assembly.
Caution: While pulling up on the suction cup, you should not apply inordinate force as this could split the MacBook LCD screen. At one point, the glass will effortlessly come free from rest of the display assembly. Set the glass aside on the clean, dust free surface. This is presumably the hardest part.
STEP 9:
 Remove four Philips head screws ( 2 on either side ) holding the MacBook LCD screen to the display frame. Additionally, also remove the 2 Philips head screws at the bottom of the display assembly. For removing the screws easily we recommend using a small flathead Phillips screwdriver.
STEP 10:
 Slowly separate the screen from the back cover by applying a delicate upward pressure.
STEP 11:
 To access the cable connector on the bottom lift the screen slightly. You will have some restricted access to the connector.
STEP 12:
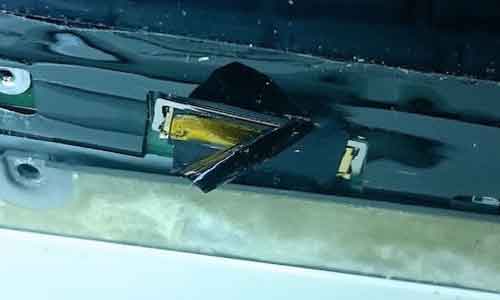 Remove black mylar tape securing the connection.
STEP 13:
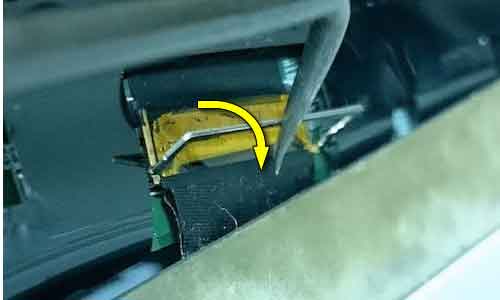 Unlock the connector carefully.
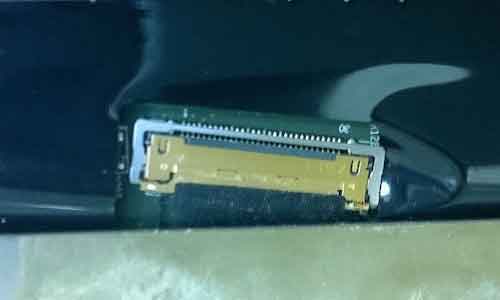
STEP 14:
 Pull the video cable from the connector. Replace the damaged LCD screen with the new one.
STEP 15:
 Accordingly, Position the new screen so that you can connect the video cable to the connector.
STEP 16:
 Lock the metal retainer.
STEP 17:
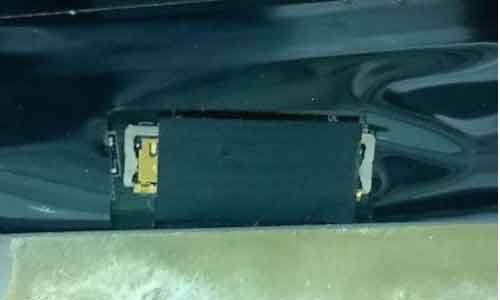 Stick the mylar tape back on the connector.
STEP 18:
 Before putting the glass back on, use a clean cloth to remove any dust or fingerprints from glass panel and the LCD screen. Now secure the screen with the help of 6 screws inside the display assembly.
